Monday, October 1, 2018

Hello everyone!!
Sorry that it has been a little while since I posted on the blog. I do update my facebook page regularly but when it comes to blogging I am a bit laid back. 
Today I am here to share some handmade flowers and gift bags that I made for Ganesha festival.
Ganesha Chaturthi is celebrated in a grand way at home through the generations. My maternal Grandmom used to get a real floral mantap done every year for the festival.
This year we decided to do a peach and gold theme. The flowers on the arch are handmade. This was my first try of Foamiran flowers and enjoyed making the same. They are easy to work with but require a lot of patience too. They have been coloured using archival inks and the beautiful pollens are a giveaway that I won from Icraft. For the gift bags I have used Forever and Always paper pack from Itsy Bitsy and used We R Memory Keepers gift bag punch board for the same. The beads rangoli design was done by my Mom a few years back and the colours can be changed. I am also sharing a pic of my messy table as I thoroughly enjoyed making the flowers though it was a long process. So here are the pictures.

My messy craft table....but this is also my happy place!!

Foamiran flowers die cut and colored with archival inks.

Foamiran flowers die cut and colored with archival inks.

The whole set up.

Another view of the set up.

Gift bags which had a blouse piece, bangles and haldi kumkum.

Gift bags which had a blouse piece, bangles and haldi kumkum.


The whole thing was put together by my sister, sister-in-law and me. I hope you all like them too!!

Thank you very much for visiting my blog. I would love to hear from you and truly appreciate your feedback. Have a great day!!

Thursday, July 19, 2018

Good morning everyone!!

Hope your week has been good so far.

Today I am sharing a set of gifts that I recently made for a person with whom I share a special bond.....my twin sister. 

Life has been more memorable and joyful thanks to our craziness for shopping, cooking, outings, our silly fights, travels, etc. To this day we like to wear identical clothes for special occasions and our tastes are quite similar. Our Birthdays are extra special at home because of the twin celebration and for many years it used to be grand with a lot of friends and relatives. 
"There is no better Friend than a sister and there is no better Sister than you. I am blessed to have you as my twin and I wish you all the happiness and good luck in the years to come". 

Happy Birthday Sis :)

From the time I started crafting full time, I make it a point to make handmade gifts for her. This year I made this card and a decoupage hexagon box.


I have done decoupage for the sides of the box with this lovely floral print napkin. For the lid I have used Itsy Bitsy's Passionate plum chalk paint and added a hint of green acrylic paint using dry brush method. Passionate plum is one of my favourite colours in their chalk paint range. The colour appears a little different in the pictures than in real. I have also added the same tissue with a frame on the lid and done clear heat embossing to get the glitter effect.


For the card, I chose a metallic blue base and created a background of my own on Bielo cardstock using distress inks. The Birthday sentiment has been heat embossed on vellum  and I have used Prima flowers to embellish the card along with a few clear droplets. This is the first time I used Prima flowers and I am in love with these beauties. I hope to add more to my stash soon.


I hope you liked these Birthday gifts that I made for my sister.

Thank you very much for visiting my blog. I would love to hear from you and truly appreciate your feedback. Have a great day!!

Linking this post to Itsy-bitsy-blog-challenge-15


Wednesday, June 13, 2018

Life is Beautiful - Mixed Media Wall Decor

Good afternoon everyone!!

Firstly....Thank you all for taking time to read the note I wrote about my dearest Mom in my previous post. It means a lot to me.

Today I want to share a Mixed Media Wall Decor that I created for the on going Itsy Bitsy blog challenge using their Little Birdie Decoupage paper.

Mixed media wall decor

Supplies used for the wall decor

I have created this wall decor on a Mdf triangular base. For the base coat I have applied Tattered Lace chalk paint and simultaneously fussy cut the design from the decoupage paper. After the base was dry I adhered the paper to the base with help of Mod Podge and also sealed the paper using the same. The paper is thin and very easy to decoupage. Next I created some texture using modelling paste and a stencil. Once that was dry I used acrylic paints.....White, Raw Sienna, and Burnt Sienna to get the desired effect. To add more interest I have stamped randomly using Archival ink and also splattered Burnt Umber acrylic paint. To highlight the textures I have used Fire Ruby Antique Brilliance wax from Prima. Next I varnished the whole surface to protect the wall decor. Finally I have added a burlap piece, ribbon, a metal butterfly, primed chipboard, wooden discs and flowers to complete the project and make it beautiful. 


Below are some more pictures:


I thoroughly enjoyed working on this project and hope you liked it too.

Thank you very much for visiting my blog I would love to hear from you and truly appreciate your feedback. Have a great day!!

Linking this post to Itsy Bitsy Blog Challenge #14-2018


Sunday, June 3, 2018

A special card!!


Hello everyone!!

Hope you had a good weekend.
I am sorry that it has been a long time since I updated the blog. I was a bit pre-occupied with order work and other things. But now I hope to blog regularly.

Today I am sharing a special card that I made in remembrance of my beloved Mom on her Birthday June 3rd. But before that I want to share a few words about my amazing mother.

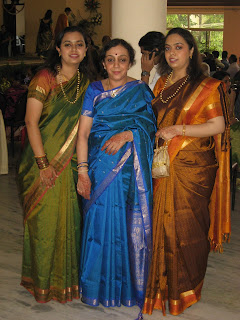
My mom was a very talented and gifted person. She was into art and craft right from her school days. Even for her own wedding she had done a whole lot of decorations and favours all by herself. She learnt sewing only because she wanted to design and stitch beautiful frocks and dresses for my twin sister and me. She had mastered the skill so well and almost for every other function or occasion we would have a new dress stitched by her in no time. She was an ever enthusiastic shopper and would always go the extra mile to purchase best things be it at Jayanagar, Raja market, Commercial street or during her annual visits to Chennai.  Mom was also an expert in cooking and baking. She used to plan, cook and host my brother’s and our birthday parties and other family parties very well. The customary chocolate cake was always baked by her for all birthdays at home. She was a perfectionist in everything which even includes taking care of her family and being there for us whenever we needed her. Her radiant smile and gorgeous self always spread positivity, laughter and happiness to all. Mom was a very happy go lucky, down to earth and practical person in life. It is from her that I have acquired the interest, passion and skills to be a crafter. My mom, sister and me used spend time crafting or cooking together during summer vacations. I miss her for everything and more so while crafting. Wish she was around to craft and guide me more. I am sharing a picture of mom with my twin sister and me taken in December 2009.

Happy Birthday Mom....you are always and forever in our hearts and minds. Miss you!!

Now to share the card that I made....


I had set my mind to create a card as soon as I saw this paper pack in person. The paper pack "Home is where Mom is" has been designed by Divya Thallap for Craftslane.

I have chosen a purple cardstock from Fabriano Elle Erre as the base of the card. The yellow metallic cardstock has been embossed using a We R memory keepers 3d embossing folder and the edges have been distressed. On this I have used some cheese cloth and a Jaali background chipboard from Craftslane. I have added Prima snowflake paste on the chipboard to add some interest and glitter to the card. For the focal point I have fussy cut a few elements from the paper pack and to make it a bit sturdy I have adhered them to a cardstock. This has then been glued to the card using double sided foam tape to add some dimension. Next I embellished it with some sequins, enamel dots, a bow and a dragon fly charm. Finally I added a bit of Wink of Stella glitter on the focal point for the shimmery look.

Another view of the card.
A closer view of the card.

I hope you enjoyed reading about my mom and also the card that I made in remembrance for her. 
Thank you very much for visiting my blog. I would love to hear from you and truly appreciate your feedback. Have a great day!!


Monday, March 19, 2018

Good evening everyone!!

Hope you had a good weekend. 
For me it was festival time as we celebrate Ugadi, the New Year's day for Kannadigas. 
At the same time Spring season is here and so are the beautiful flower blooms on trees in shades of pink, yellow and purple in Bangalore. Inspired by these beauties I have created a card today and sharing my first tutorial too. So sit back and enjoy this picture heavy post.

First I have taken a white card stock panel measuring 4-5/8 inches by 6-5/8 inches. This is the base on which I will be adding my elements.


Next I have taken a Brick design stencil from Itsy Bitsy's Little Birdie brand to create a background. Using scotch tape I have created a rough area to work on and this also helps in keeping the stencil in place. I have used Rusty Hinge Distress Ink and applied it using a sponge dauber to get a nice brick effect.


Along side I have also die cut two frames using my Sizzix Big shot machine. These are from the Double stitched rectangle die set from Die Cuts and More store. The narrow frame has been glued on to the broader one using Tom Bow Mono liquid adhesive.


In the next step I have used glossy accents and fairy glitter dust on the narrow frame to add a glittery look to the card. The frame will be placed in the centre with brick wall as background. I have also done slight embossing on the white card panel using the scoreboard. The other elements you see are a mdf laser cut out from Craftslane, yellow roses from Crafters corner, a metal butterfuly charm and few sequins to decorate my card. Using double sided foam tape I have adhered the frame to my card panel. Then added the laser cut out, roses and butterfly.


I wanted to add a sentiment to my card and so used a stamp from MFTs Simply fab sayings. This is my most used stamp set for sentiments. I have used double sided foam tape to stick this too.


Once the card panel was ready I used Tom Bow Mono liquid adhesive to glue it to the card base. For the card base I have chosen a yellow metallic cardstock from The Craft shop. I have cut the cardstock to 10 inches by 7 inches and using the scoreboard I have made a score line at 5 inches to fold the card in half. The final card base measures 5 by 7 inches.


So here is the final look of my card after adding all the elements, clear drops and sequins. To add more shine I have used Wink of Stella clear glitter brush pen on the broader frame and on the sentiment too.


A closer view of the card.


Another picture of the complete card.


I hope you enjoyed the tutorial. If you have any queries related to this you can reach out to me and I would be happy to help you.

Thank you very much for visiting my blog. I would love to hear from you and truly appreciate your feedback as this is my first tutorial post. Have a great day!!

Monday, March 5, 2018

Chalk paints!!

Hi everyone....

Good morning and welcome back to another post on my blog.

Today I am here to share my projects using Itsy Bitsy's Chalk paints. They are water based paints which can be used on a number of surfaces like wood, glass, metal, etc and even on furniture. It can be directly applied on a surface and does not require any primer. Chalk paints have a chalky matte finish and it is easy to achieve a weathered and aged look by either sanding or using dry brush method. They can even be thinned down by adding water and the drying time is very less too. They come in a variety of shades and I love the pastel ones more.

For my first project I have used chalk paints to decoupage an Mdf box from Craftslane.


I first applied Tattered lace chalk paint to the lid of the box and then adhered the 'Love is in the Air' tissue using decoupage technique. For the sides and base of the box I have used Sailing sky chalk paint and later on I have dry brushed Tattered lace chalk paint on it to give an aged look. Finally I have sealed the lid of the box with Mod Podge and applied varnish to the entire box.


The brush strokes give an aged look to the box.


For my next project I have directly applied Chalk paints to the Mdf organizers.


For these desk organizers, I have used Sailing sky chalk paint and Drift wood chalk paint directly on the organizers. These paints are fast drying and so it is very easy to work layers on them. For the second layer I have used dry brush technique. Tattered lace has been used on the Sailing sky chalk paint and for the Drift wood one I have used Burnt Umber acrylic paint to get that look. Finally I have applied varnish to both the organizers and sealed them.


Personally I liked the chalky finish of these paints even after applying varnish. Do let me know your opinion if you have tried these paints. 


Thank you very much for visiting my blog. I would love to hear from you and truly appreciate your feedback. Have a great day!!


Saturday, February 17, 2018

Baby Boy Waterfall Folio


Hello!!

Hope you all are enjoying the weekend.

Today I am here to share a Waterfall folio in a Baby Boy theme that I made using Itsy Bitsy's Baby Boo paper pack. A few years back I had made a basic Birthday album for my sister and after that this is my first try of a mini album with binding. This had been on my to do list for a very long time and thought this paper pack would be ideal to start off. The pattern papers are super cute and it comes with a sentiment sheet too.


The colors used for embellishing are in hues of blue and white keeping in mind the colors of the paper pack. The Waterfall folio can be used to add pictures or record any important milestones of the baby. The left side pocket has two tags for journaling. 

Below are more detailed pictures of the Waterfall folio:


The inside view with the Waterfall folio for pictures and tags for journaling.


The Waterfall folio can hold upto 14 pictures or be used to record important milestones.


The embellishments are from Little Birdie and the sentiment is from La'Amour paper pack.


The front cover of the Waterfall folio.


I hope you liked my Baby Boy Waterfall Folio. Thank you very much for visiting my blog. I would love to hear from you and truly appreciate your feedback. Have a great day!!
Linking this post to Itsy Bitsy Blog Challenge #1 2018


Monday, February 5, 2018

Decoupage Rectangle Box

Hello everyone....

Today I am here to share a decoupage box and also a little information about this art form.

Decoupage is an art of decorating an object like wood, glass or ceramic by gluing pattern paper, tissue paper or rice paper with special varnishes and sanding the same, till it becomes one with the object. Effects are created on it with paints and inks before giving it a final coat of wood varnish. I work on MDF wood products like boxes, trays, tissue box holders, monograms, coasters etc. Apart from regular floral and abstract designs, I have worked on themes such as Ferrari, Mc Queen, Frozen and Planes in the past. I learnt the art of decoupage from my dearest friend Divya Thallap of Yelling Yellow in the year 2014 and since then I have been hooked on to this art form which is so versatile.

For today’s project I have used a rectangle Mdf box as base from Craftslane. Craftslane has a wide variety of Mdf products which I use as the base in most of my decoupage projects. The pattern paper used here is from DCWV The Glam Rhinestone Stack Pack which I had bought from Itsy Bitsy, India's number 1 hobby and craft store with a physical presence in most cities as well as an online store. 


This is a simple decoupage technique where the pattern paper has been adhered to the Mdf box using Mod Podge which is then sealed and varnished.


I love the mauve colour in this pack and the pretty paisley pattern too. The rhinestones add a touch of sparkle to the box.


I hope you liked my project. This box can be used to store jewelry, keys and other knick knacks. It is a wonderful decor piece to keep in the drawing or on the dresser.


Thank you very much for visiting my blog. I would love to hear from you and truly appreciate your feedback. Have a great day!!